Creating a plugin
Extend Subkit by creating and sharing plugins.
Table of contents
Overview
At its core, a Subkit plugin is simply another browser extension that sends and responds to hook messages from Subkit.
At the bare-minimum, it’s a single javascript file and an extension manifest json file.
For this guide, we’ll create a plugin that highlights words from a pre-defined list whenever they appear in a subtitle.
Subkit is still in beta so API’s could change more frequently than usual.
Getting Started
To begin, create a folder called something like word-highlighter and a .json file called manifest.json, a javascript file that we’ll call background.js, and an icon svg that you can grab here using the download raw file button.
~/word-highlighter/
-- manifest.json
-- background.js
-- highlighter-icon.svg
Next, we’ll add a manifest file, send a registration message, and handle two Subkit hooks.
Manifest
An extension manifest file is needed by browsers to describe the metadata and permissions an extension requires. You can read more about Chrome’s manifest file here.
Since our highlighter plugin will be very simple, it won’t require any permissions beyond making the icon available to all urls.
manifest.json
{
  "manifest_version": 3,
  "name": "Word Highlighter",
  "description": "An extension that highlights words from a predefined list.",
  "version": "1.0",
  "background": {
      "service_worker": "background.js"
    },
  "web_accessible_resources": [
      {
          "resources": [ "highlight-icon.svg" ],
          "matches": ["<all_urls>"]
      }
  ]
}
Registration Message
In order for Subkit to know about and use your plugin, you’ll need to register it. Browser extensions can talk to each other via the runtime.sendMessage() and runtime.onMessageExternal() methods, however, since runtime.sendMessage() requires the recipient extension’s ID, you must first send a registration message to Subkit with your extension’s ID so that Subkit can subsequently send hook messages to your plugin.
The easiest way to do this is to send a message to Subkit as soon as your app is installed. We can do this by adding a listener to runtime.onInstalled like so:
background.js
const SUBKIT_EXTENSION_ID = 'nbfimkdbifhjfambljjggekodjlppiad';

chrome.runtime.onInstalled.addListener(() => {
    chrome.runtime.sendMessage(SUBKIT_EXTENSION_ID,
      {
        command: 'register-plugin',
        name: 'Word Highlighter',
        description: 'Highlight words from a predefined word list.',
        help: "This plugin will highlight words from a predefined list whenever they appear on a subtitle.",
        icon: chrome.runtime.getURL('highlighter-icon.svg'),
        hooks: ['onsubtitlesready']
      },
      function (response) {
        console.log(response);
      }
    );
});
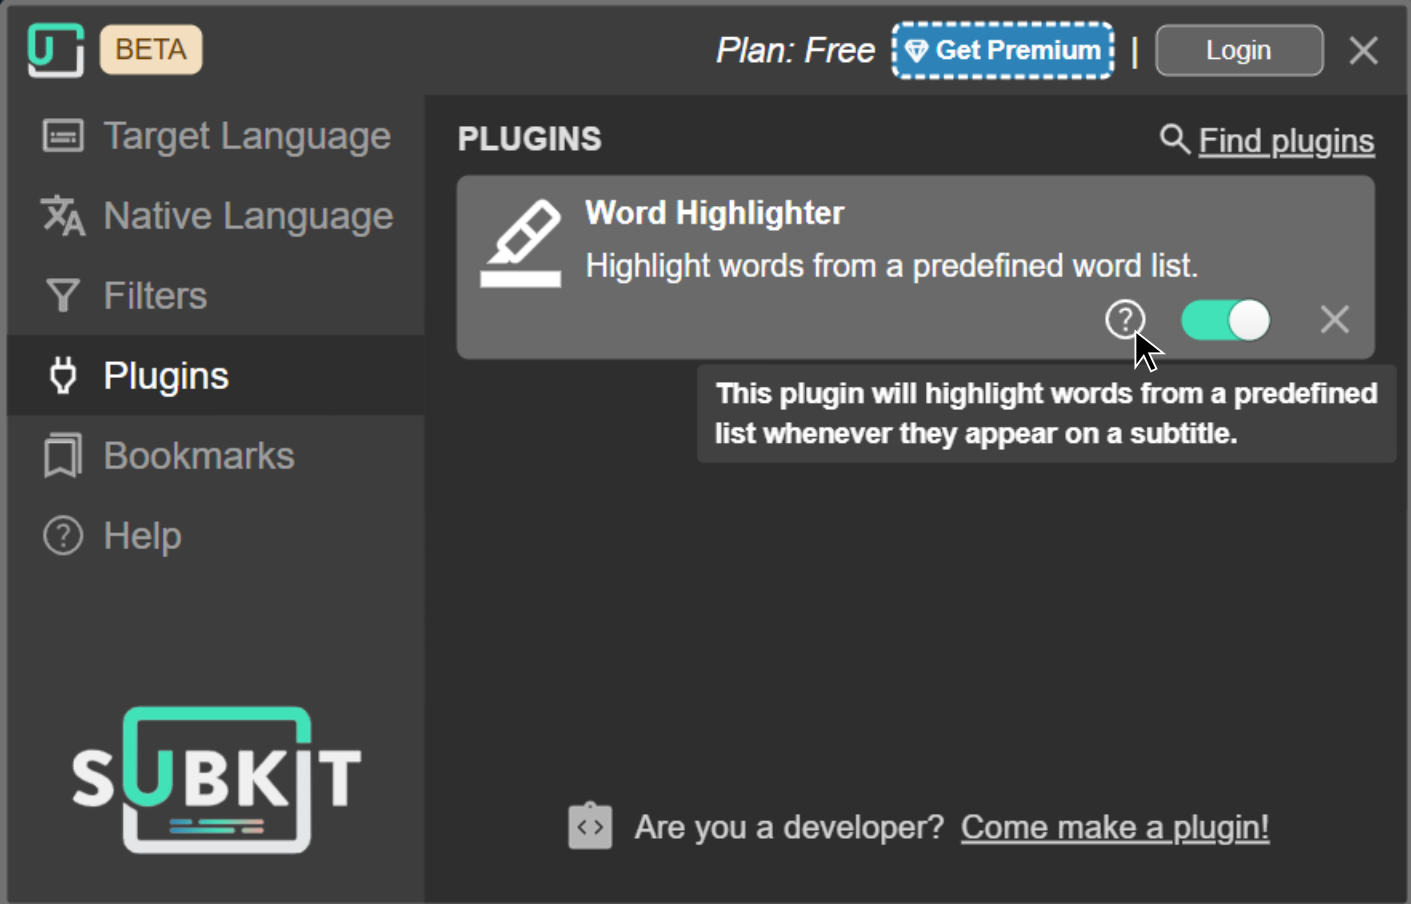
The register-plugin command message has 6 fields for describing your plugin. These fields correspond to what displays in the plugin list and which hooks the plugin is prepared to handle.
You can leave help, and icon blank if your plugin is self-explanatory from the name alone. A default plug icon will be provided.
Hooks
Currently Subkit has 2 hooks: One for retrieving the currently selected subtitles before they are displayed, and one for adding additional CSS styles.
We plan to add many more hooks, however please let us know in the public discord if there’s anything in particular you’d like us to make available via a hook or other API.
Subtitles Hook
The OnSubtitlesReady hook allows your plugin to modify the subtitles that a user selects, prior to displaying them. For example, The first-party Japanese Furigana plugin uses this hook to wrap the outgoing Japanese subtitles in Ruby tags containing furigana.
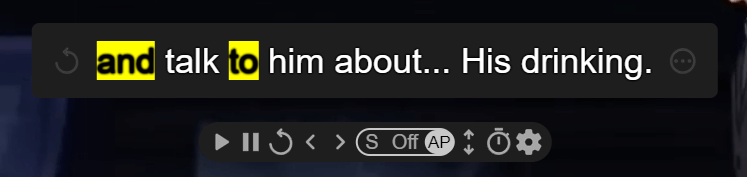
We’ll do something similar in our highlighter plugin by detecting any instances of a word from a pre-defined word list and wrap it in HTML <mark> tags.
Our word list will be a simple in-memory array, but you could of course use a database, API call, or some other resource.
const words = ['the', 'and', 'to', 'for', 'yes', 'no', 'it'];

chrome.runtime.onMessageExternal.addListener(function (request, sender, sendResponse) {
  if (sender.id !== SUBKIT_EXTENSION_ID) {
    return;
  }

  if (request.command === 'on-subtitles-ready-hook') {
    const hookResponse = {
      command: 'on-subtitles-ready-hook-response',
      subtitles: request.subtitles,
      error: ''
    };

    // only process english subtitles, otherwise send them back unmodified.
    // target language must be set in subkit.

    // if (request.language !== 'en') {
    //   return sendResponse(hookResponse);
    // }

    request.subtitles.forEach((subtitle, index, subtitles) => {
      let html = subtitle.text;
      words.forEach(word => {
        html = html.replace(new RegExp('\\b' + word + '\\b', 'g'), `<mark>${word}</mark>`);
      });
      subtitles[index].html = `<span>${html}</span>`;
    });

    hookResponse.subtitles = request.subtitles;

    return sendResponse(hookResponse);
  }
});
Here, we’ve set up a browser onMessageExternal() listener with guard classes to exit if the message isn’t from Subkit or if it’s not the expected hook. We also send the unmodified subtitles back using the response object if they aren’t in the expected language, English in this case. In an upcoming version of the API you’ll be able to specify the desired language.
Finally, we iterate the subtitles and wrap them in <mark> tags if they match our word list. Take note that the request object contains both the raw subtitle text and the HTML that will be displayed.
See the below message format section for the request and response object specifications.
Message Format
interface OnSubtitlesReadyHookMessage extends Message {
    command: 'on-subtitles-ready-hook',
    subtitles: PreparedSubtitle[],
    language: string
}

interface OnSubtitlesReadyHookResponseMessage extends Message {
    command: 'on-subtitles-ready-hook-response',
    subtitles: PreparedSubtitle[],
    error: string
}

interface PreparedSubtitle {
    id: string;
    start: number;
    end: number;
    text: string;
    html: string;
    track: number;
    previousStart: number | undefined;
    nextStart: number | undefined;
}
Here’s what it looks like after installing:
Cool, right? But what if we want to customize the appearance of the highlights? We can do that using the OnAddStyles hook.
Styles Hook
To style our marked words, we’ll modify our registration code to specify the styles hook and then add an additional block of code to the onMessageExternal handler that will inject CSS that will target our <mark> tags. We’ll also need to add a css class to the subtitles to prevent targeting the wrong elements.
The //... means the code was omitted for brevity. See the repository for the completed plugin.
//...register-plugin
hooks: ['onsubtitlesready', 'onaddstyles']
//...
chrome.runtime.onMessageExternal.addListener(function (request, sender, sendResponse) {
//...
if (request.command === 'on-add-styles-hook') {
sendResponse({
command: 'on-add-styles-hook-response',
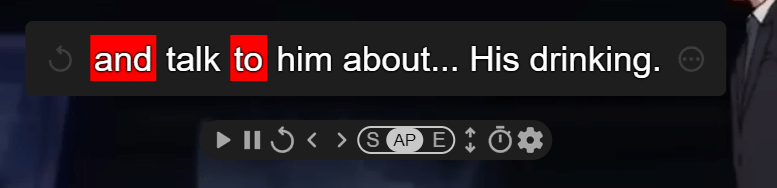
styles: ".marked mark { color: white; background-color: red; }",
error: ''
});
} else if (request.command === 'on-subtitles-ready-hook') {
//...
request.subtitles.forEach((subtitle, index, subtitles) => {
//...
subtitles[index].html = `<span class='marked'>${html}</span>`;
});
//...
}
});
After reinstalling, our highlights are now red with white text:
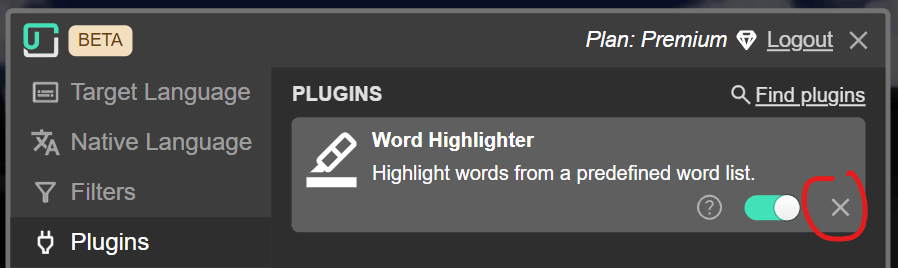
Because we’ve modified the registration message which is only called upon installation, we’ll need to remove our plugin completely from Subkit’s plugin list and the browser extension list and then reinstall. An upcoming version of the API will allow a smoother update process.
Message Format
interface OnAddStylesHookMessage extends Message {
    command: 'on-add-styles-hook';
}

interface OnAddStylesHookResponseMessage extends Message {
    command: 'on-add-styles-hook-response';
    styles: string;
    error: string;
}
Installation
Installing your plugin is dependent on the browser, however currently Chrome is the only tested browser. The two most common ways of installing are: 1) submitting your app to the Chrome Webstore, or 2) providing the unpacked version of your plugin so users may use Chrome’s developer tools and load the unpacked plugin in the same way you did while developing.
Once loaded or installed from the webstore, the plugin should appear in Subkit’s plugin list, provided it was active. If you don’t see it in the plugin list you may need to refresh the page that Subkit was running in to ensure it hasn’t gone idle and then try reinstalling the plugin again.
You can remove the plugin (unregister it) by clicking the ‘X’ icon on the item in the plugin list. Then remove it from the browser itself.
Distribution
You can share your extension either by using the applicable browser’s extension marketplace (currently only the Chrome Webstore), or by providing the unpacked package to users and instructing them on how to install it manually.
Please let me know if you’ve created a plugin so it can be displayed publicly on any current and future plugin lists. Currently the discord has a channel for that purpose.